NetApp Virtual Appliances like OnCommand Unified Manager 6 or OnCommand Performance Manager 1 are normally deployed within VMware ESX hypervisors. It can work on other hypervisors as well but it requires additional steps to workaround an error that occurs when you try to set the IP address to something else than DHCP. The purpose of this article is to explain how to make IP configuration available when you setup the virtual appliance in a lab-on-laptop lab, or anywhere else that is not a ESX server.
When you try to change the IP address, either in the web UI or in the VM console, you will get an « unknown error » while trying to apply the settings.
This is caused by the way the configuration scripts handles errors while restarting the different services. For some reason, applying network settings restarts VMware tools, and with it, the HGFS service that is not available by default on a VMware Fusion VM which reports the error. It makes the configuration script roll back to previous setting.
To prevent that issue, you must restart the virtual appliance, bypass normal boot, and edit vmware-tools init script manually.
Boot the virtual appliance directly in a shell
Boot the VA, and you should see a boot selection screen like this one :

Standard boot screen for a NetApp Virtual Appliance
Type the « e » letter before the countdown expires.
Then you need to edit the boot argument on the line that starts with « linux » to make it look like this :
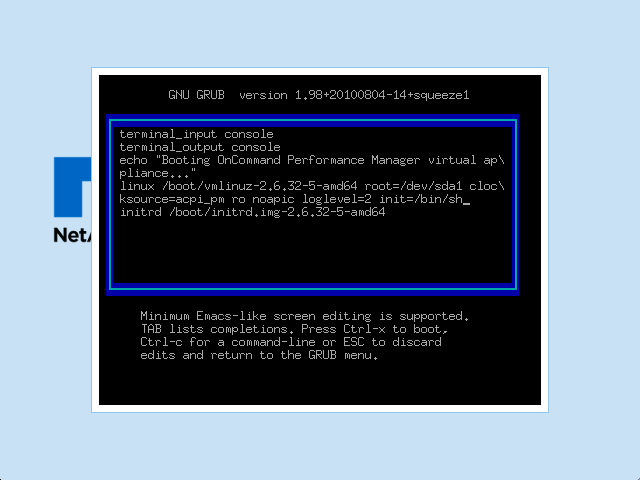
Boot arguments screen for a NetApp VA
Basically, you remove « quiet » and « console=tty2 » arguments, and add « init=/bin/sh »
If you do that correctly, you should get to the following screen after typing « Ctrl-x » to boot
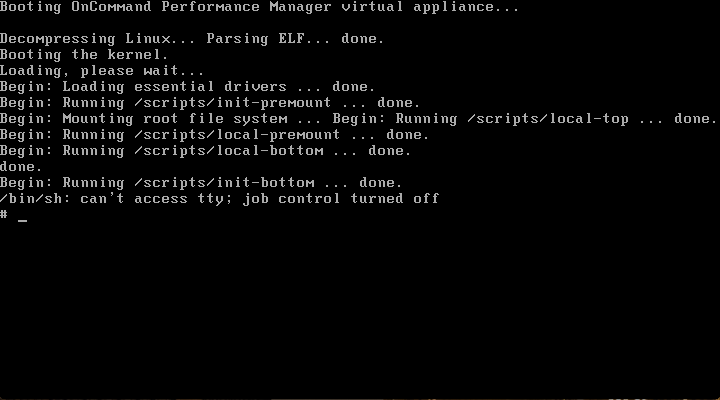
This is the shell prompt you should get
Modifying the vmware tools script
For now, the filesystem is mounted read-only, you need to remount it with « rw » option :
# mount -o remount,rw /
Then edit the following file :
# vi /etc/init.d/vmware-tools
- go to the line that says « is_vmhgfs_needed » by typing « :/is_vmhgfs_needed«
- insert a new line by typing « o » (lowercase o)
- type « echo no«
- Type Esc
You screen should like this one :

Editor screen once the changes has been made
Type « :x! » to quit and force writing the file to disk
Type « reboot »
Once the VA has rebooted, you should be able to change IP configuration.
Alternative
If you prefer, you can also shut down the virtual appliance, and present its first disk to another Linux VM, then mount it to make the change in the configuration file.