Genesis of a 2017 home lab

Up until now, pretty much all of my lab stuff were running off of my laptop. I’ve been very happy with it, but these days, the products are more complex, more dependent on each others, and it becomes very hard to maintain a consistent environment available anytime, and scalable. Plus, the MacBook Pro I’m using is getting quite hot when under pressure, I do not feel comfortable anymore running a lot in VMware Fusion on a laptop, I guess I reached the limit of a backpack lab.

Part I. Identify components

I did quite some research about home lab equipments that wouldn’t break the bank, I was somewhat disappointed and realized I didn’t have reasonable expectations and I will have to make compromise.

In my ideal world, a home lab has a small footprint, has a load of RAM, and is absolutely silent. Well, that’s not going to happen, the most painful part for me was that today there is no reasonably priced fanless PC that can run an i5 and host at least 32G of RAM.

When I realized that was not happening, and lowered my expectations, it became a little bit easier and after doing some research, settled for the following configuration from Newegg :

  • Intel NUC BOXNUC7I5BNH ($376.99)
  • SAMSUNG 960 EVO M.2 250GB NVMe ($127.99)
  • 2 x Kingston Module DDR4 2133mhz 16 Gb ($353.98)

For a total of $858.96. It’s more than what I wanted to pay, but I’m cheap, I realized eventually you have to break the bank to get some serious gears. Of course, you could always find cheaper stuff second hand, or if the small form factor isn’t really a requirement. But for example, going for 1U rackable servers, you need to think about power consumption and on the long run it mights not be worth it.

Intel NUC

I considered multiple options, and there is actually a pretty good article on the subject over here. The Supermicro seems really appealing, mostly because of the embedded management card and high RAM configuration supported, but really, it’s hard to beat the cheap $377 of the NUC. Go for a E200-8D or E300-8D if you think it’s worth spending the bucks, but be careful that they might make much more noise because of the 3 tiny fans they use to cool it down.

On the NUC side, the Skull Canyon NUC6i7KYK, gives you another M.2 slot and some decent graphics performance if you need it.

Shuttle seems to have interesting options as well, for a few more bucks, you can get a DH110 that provides 2x1GBE ports and you can pick the CPU you want.

SAMSUNG 960 EVO M.2 250GB NVMe
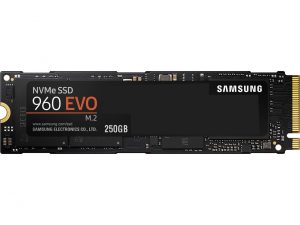
Samsung has a solid reputation in flash media, I wanted NVMe very fast memory, considering the relatively cheap price I think it’s totally worth it. The NUC also has a regular SATA III expansion bay if I need to add more capacity with a spinning drive or a regular SSD drive.

I settled for 256G to start. The idea is if I reach the storage capacity before I reach the RAM capacity then I’ll upgrade or I’ll put another SATA III SSD in the NUC. My goal for this lab is to rely on containers as much as I can so the storage footprint will be less than actual VMs.

But if your intent is to host regular VMs, you might want to go for the 512G option.

Also, consider there is a sweet spot to find between one powerful lab server, and multiple ones. Workloads are very mobile today and ideally you probably want to run multiple physical servers to get some resiliency and flexibility. For budget reason, I didn’t do it, but I would have preferred 2xNUC with 16G RAM and 256G storage instead of one big 32G.

2 x Kingston Module DDR4 2133mhz 16 Gb

RAM, RAM and RAM… What else is all that about anyway? Since the flash memory era, thank god we can put that behind us, the storage is no longer the contention point in home lab equipments. In my opinion CPU doesn’t matter much either, of course it all depends on the kind of application you will host, but RAM is what we need.

Out of the bat I will be running the hypervisor itself, a few containers, Data ONTAP simulators, even 32G can go fast, I think 16 might have been limited. From what I saw, you can start with one 16G module and buy another one later, but it probably depends on the compute platform/motherboard/cpu.

With 32G you should be able to run a decent environment without having to shut down VMs all the time.

SanDisk 32GB Ultra Fit Flash Drive

Not the most critical component, but I decided to go with a thumb drive installation of ESXi for this lab. That way I can dedicate the NVMe for datastore and avoid multiple partitions, for $12 it’s likely worth it. Chances are I won’t need these USB ports for anything else anyway.

Conclusion

Stay tuned! I’m waiting for the components and I will document my progress with the installation and setup!

Display « big talkers » clients on cDOT

It is a common request from customer that wants to know who are the most active clients to a system. Though not hard to obtain, there is no obvious menu that lets you do that, so there it is :

First of all, you need to be in advanced mode and start statistics collection for the « client » object :

netapptest2::*> set advanced
Warning: These advanced commands are potentially dangerous; use them only when directed to do so by NetApp personnel.
Do you want to continue? {y|n}: y

netapptest2::*> statistics start -object client
Then you let it run for some time, and you can start looking at who the most active clients are :
 netapptest2::*> statistics show -object client -instance !Cluster* -sort-key nfs3_ops -counter nfs3_ops -tab

ntap2_vs1: client: 5/31/2016 23:59:26

instance nfs3
 name ops
 ---------------------- ----
 ntap2_vs1:10.20.245.11 31
 ntap2_vs1:10.20.45.95 0
 ntap2_vs1:10.20.45.67 0
 ntap2_vs1:10.20.45.60 0
 ntap2_vs1:10.20.45.58 0
 ntap2_vs1:10.20.45.43 0
 ntap2_vs1:10.20.45.40 0
 ntap2_vs1:10.20.45.39 0
 ntap2_vs1:10.20.45.37 0
 ntap2_vs1:10.20.45.33 0
 ntap2_vs1:10.20.45.235 0
 ntap2_vs1:10.20.45.234 0
 ntap2_vs1:10.20.45.226 0
 ntap2_vs1:10.20.45.225 0
 ntap2_vs1:10.20.45.223 0
 ntap2_vs1:10.20.45.221 0
 ntap2_vs1:10.20.45.218 0
 ntap2_vs1:10.20.45.195 0
 ntap2_vs1:10.20.45.19 0
 ntap2_vs1:10.20.45.183 0
 ntap2_vs1:10.20.45.18 0
 ntap2_vs1:10.20.45.158 0
 ntap2_vs1:10.20.45.157 0
 ntap2_vs1:10.20.45.156 0
 ntap2_vs1:10.20.45.134 0
 ntap2_vs1:10.20.45.133 0
 ntap2_vs1:10.20.45.132 0
 ntap2_vs1:10.20.45.124 0
 ntap2_vs1:10.20.45.120 0
 ntap2_vs1:10.20.45.118 0
 ntap2_vs1:10.20.45.114 0
 ntap2_vs1:10.20.45.113 0
 ntap2_vs1:10.20.45.108 0
 ntap2_vs1:10.20.45.100 0
 34 entries were displayed.

You can use another field instead of nfs3_ops, just use « ? » character to get a list of available fields when you get to that part of the command line.

Here are the options available at this time, you can also use multiple fields by using a comma « , » separator.

  cifs_ops                    
  cifs_read_ops               
  cifs_read_size              
  cifs_write_ops              
  cifs_write_size             
  instance_name               
  instance_uuid               
  local_ops                   
  mount_ops                   
  nfs2_ops                    
  nfs3_ops                    
  nfs4_ops                    
  node_name                   
  node_uuid                   
  process_name                
  remote_ops                  
  rx_data                     
  rx_packets                  
  total_ops                   
  tx_data                     
  tx_packets                  
  vserver_id                  
  vserver_name

Configuring Network for NetApp Virtual Appliances in Fusion

NetApp Virtual Appliances like OnCommand Unified Manager 6 or OnCommand Performance Manager 1 are normally deployed within VMware ESX hypervisors. It can work on other hypervisors as well but it requires additional steps to workaround an error that occurs when you try to set the IP address to something else than DHCP. The purpose of this article is to explain how to make IP configuration available when you setup the virtual appliance in a lab-on-laptop lab, or anywhere else that is not a ESX server.

Continuer la lecture

New to NetApp? Where should I go now?

Hanging around on NetApp communities, I came across that post from a freshly NetApp certified person wondering about where to go next, and how to gain experience with NetApp storage. Long story short (since this was not exactly what Fabian was looking for), I started to think about good learning tricks and how my personal experience would be worth sharing.

Continuer la lecture

Format a list of snapshots coming from a controller

Part of my job is to analyze different data from my customer’s systems and dozen times a day I have to parse and transform regular output from Data ONTAP systems to more organized format, suitable for an Excel spreadsheet for example.

This time I needed a list of  snapshots in a system.

Continuer la lecture

System Manager 3 for Mac

Here is an integrated version of System Manager 3 for the Mac.

Of course, this is an absolutely not supported version of System Manager. The reason why I decided to provide it to the public is because it does not use any private materials from NetApp, and is only based on the Linux version of System Manager, which is available on NetApp Support Site.

You can download it here, and you need Mac OS 10.7 minimum to run it.

This is different from the version available on ToolChest web site, and I thank Jesse for his work because without it, I wouldn’t have the idea to work on this version!

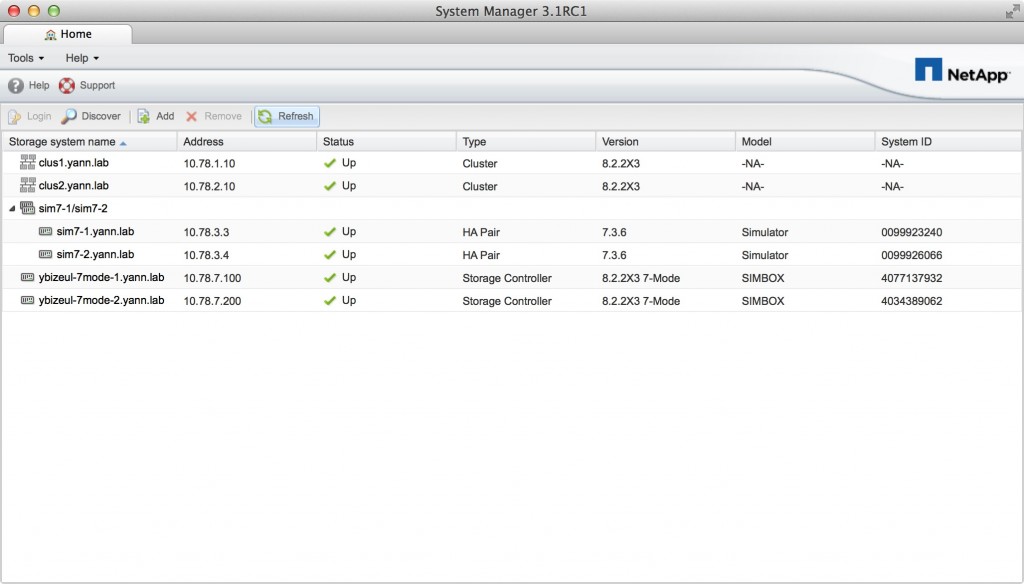
Here is a screenshot of the main window with the tab view on top, each controller you open will have its own tab.

System Manager 3 for Mac home page

System Manager 3 for Mac home page

System Manager 3 for Mac requires Java SDK 1.7 (JRE is not enough) and Mac OS 10.7.

Note that if you run it without installing the JDK, Mac OS X will automatically propose to install Java. Don’t do this as you won’t get a JDK this way, you must download it from Oracle web site and install it manually.

[EDIT] Link updated to point to version 3.1RC1

Snapmirror data from 7-mode to Clustered Data ONTAP [Screencast]

In this screencast I will show you how to migrate your data from a 7-mode system to a Clustered Data ONTAP system without using add-on software.

Note that I strongly encourage using 7MTT tool but if for some reasons, you want to do that manually, here is how.

In this video, you will see :

  • How to create the destination SVM
  • How to create the destination volume
  • How to establish a peer relationship
  • How to create the snapmirror relationship
  • How to do the cutover

Installing OnCommand Unified Manager on CentOS

CentOS is my favorite Linux distribution because it is the closest to RedHat you can find (for a reason). And I like RedHat for the simple reason that it is the most supported Linux distribution for any enterprise applications. I know usually both RedHat and SuSE are supported, but SuSE and I was never a love story and I will save you the history of this little drama for this time.

So, the idea is not to run CentOS in a production environment, unless you really have the heart of a warrior and do not care about being supported by a rock solid editor, but instead to run your OnCommand Core lab on a free OS.

I used a CentOS 6 minimal install for this tutorial.

Continuer la lecture

Serve DNS load balancing IPs on a non data network

[EDIT] Please use caution when setting up your environment according to this article. In some case, especially when using BIND DNS server with non-default parameters, you may end-up with requests going to data LIF even if they are on the storage network and you set « -listen-for-dns-query false » on it.

I got an interesting question from a customer about the way DNS load balancing is served in a cluster.

For network topology reasons, they needed to serve DNS requests on a network different from the data network used by the clients to access storage.

The problem is that Data ONTAP only listens to DNS requests on data LIFs that has been configured for DNS load balancing. The obvious issue is that if you configure an additional LIF on the management network, the load balancer will start serving this IP to the clients, which might not be the optimum path or even not routed at all.

Continuer la lecture

Changing default port 7MTT listens on

When you are running a lab in your own laptop, saving resources is a concern. Sometimes you would like to run multiple products in the same system but you can’t because of conflicting TCP/IP ports for example.

This is the case with 7MTT (login required) that conflicts with NetApp’s VMware VASA provider.

Continuer la lecture